How to redesign any website in just 10 minutes using Figma – no design skills needed.
Have you ever looked at a website and wanted to tweak it a little? In this post I’ll walk through step-by-step how any beginner can quickly change things around using Figma (and some cool plugins).
The basics
Anyone can use Figma to redesign a page from any website or web-based application in no time. You don’t need prior experience doing design, I promise.
I’ll teach you how to:
Import any website page using a plugin 🪄
Editing text 💬
Insert any image or icon using plugins and templates 🌄
Share your redesign with any colleague 🚀
That’s it. I’ll show you exactly how in each step.
First, watch out for gatekeeper designers!
Design belongs to everyone. 🤝
Unfortunately, I know some designers think otherwise.
They feel threatened by the notion that their non-designer colleagues, managers, or clients would start meddling with design software and potentially mess up their pretty grid systems, typography, and breakpoints.
Oh the horror! 👻

These types of gatekeeping designers have entirely misunderstood what value they could, and should, provide.
There is so much tech today that automates many design tasks – diminishing the need to spend time creating UI design from scratch. Much visual design work nowadays can (and should) be replaced with templates, design system components, and sometimes even AI.
I’ve been working as a designer for more than 10 years and remember somewhat fondly back to spending way too long creating icon sprite-sheets in Photoshop just to make a cool-looking menu.
But luckily, thanks to better tech, nowadays I can spend my time doing more valuable things such as:
Helping teams find clarity around goals and prioritizing efforts
Talking to customers and users
Facilitating great workshops to solve problems efficiently
Working on how to communicate ideas better
Don’t get me wrong. I still spend a lot of time producing visual design. But that’s never the end goal. Design software is just a means to an end. It is a tool for getting an idea across before it’s actually built.
Design software is just a means to an end. It is a tool for getting an idea across
I believe that, if more people in a company know how to get their idea across visually – that company will create more diverse solutions to problems.
Let’s learn how to do that using Figma!
Hey, what’s Figma?
If you’re completely unfamiliar, Figma is at the time of writing, a market-leading design tool used by designers to create UI design, build prototypes, and collaborate with their teams.
Figma is browser-based and all updates happen live. So people can collaborate and work on the same design file simultaneously. Sharing designs for review is as simple as sending someone a link.
Setup
You’ll need to first get yourself a Figma account. Ask whoever manages software at your company nicely to add you as an editor. If they say no, then maybe they are that type of gatekeeping designer I spoke about in the beginning. Ask them to read the intro to this article and get their act together and give you an account 😁
If they still say no, or your company doesn’t use Figma, you can just create a free account very easily. The free plan lets you create up to three design files.
Step 1 – Start a new design file
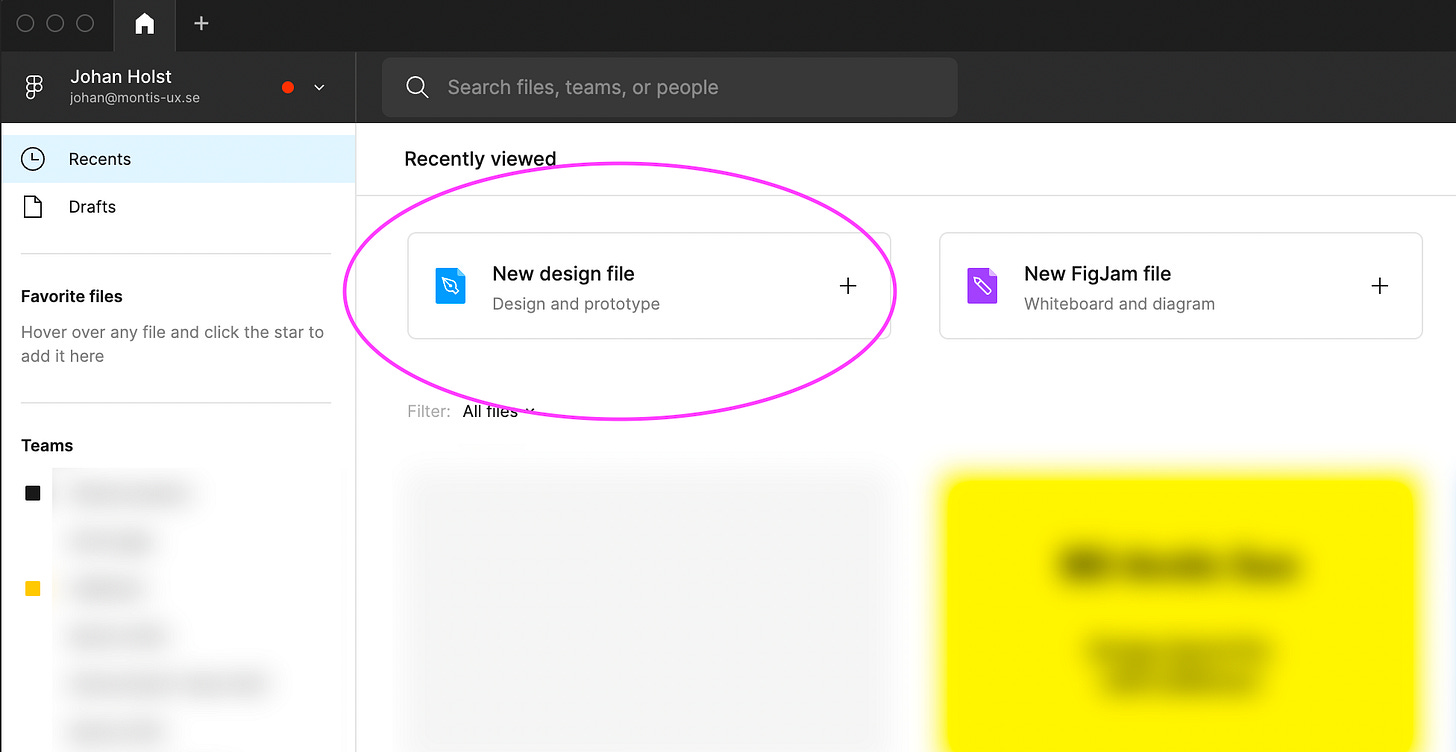
Fire up Figma and start a new design file. You can either do this by:
Clicking New design file on the start page
or,
Pressing the small plus icon in the menu bar.
or,
If you’re a keyboard shortcut nerd like me; press cmd+N (ctrl+N on windows)
Step 2 – Importing a website using the Builder.io plugin
This step feels almost illegal to know about. It’s crazy how cool and simple it is to import a website into Figma. All you need to do is to use a plugin called Builder.io
Here’s how:
Open the Resources tab (that weird-looking icon between the T and the hand icon)
Go to the Plugins tab and search for Builder.io and click Run (button appears on hover).
Go to the Import to Figma tab. Paste a link to the website you want to import under URL to import and finally press Import to Figma.
Important note – when pasting the URL into the input field, make sure you don’t get a double https://https:// thing, or the URL won’t work.
Voila! There’s your imported website in Figma!
When importing, be aware that your mileage may vary. Some imports will look nothing like the original. This is because of how differently all sites are built using different frameworks, different ways of storing data, images, and other assets etc.
They even mention it while the plugin is loading:
Note: this plugin is not magic. For best results, you may need to do some cleanup afterwards to make it production-ready.
In my experience, you ALWAYS have to do some cleanup. Coincidentally that is step 3 in this tutorial 😉
I couldn’t import anything?
Some sites just will not import at all. If you are trying to capture something with dynamic content such as a news site or a page that requires a login it definitely will not work. Luckily, there is a second method to import a site which I will describe next.
Importing using the chrome plugin:
Go to the HTML to Figma by Builder.io page in the Chrome store and press Add to Chrome
Once installed, go to the page you want to capture, run the chrome extension and capture the page. This will download a .json-file to your computer.
Go back to Figma and the Builder.io plugin. Click on the “Upload the figma.json file “here” link. Find the .json-file on your computer and upload it.
Voila! Now you should have an imported version of your site, even if it was behind a login page.
Chances are that things will not look perfect. Time for a cleanup!
Step 3 – Cleanup
The cleanup will vary depending on the site you captured. But I’ll be using uber.com as an example, it highlights some common issues that you might run into.
Images are missing
In my uber.com example one of the most glaring issues is that the big hero image is not there. For some reason the plugin did not manage to include it during the import. Luckily, with the help of chrome, it’s quite easy to source images that the plugin couldn’t find.
Go to the website and open up the inspection tools. Right click anywhere or use keyboard shortcut cmd+option+i (windows: ctrl+alt+i)
Click the little arrow icon and highlight the image, this should reveal a URL to the actual image.
Right click the image specific address and choose open in new tab
Finally, you can now either download or simply copy the image
And now, simply drag and drop from your file browser, or paste the image, into the hero area
Profit! The image is now in place in our Figma design. You may have to play around with the layers to make sure the image you paste in does not end up on top of everything. Simply right click on the image and choose “send to back” if needed.
Removing cookie banners
The builder.io plugin captures everything the website code renders. This oftentimes includes the cookie banners.
Unless you are looking to redesign the actual cookie banner, feel free to remove it. In order to be very specific with what elements you choose, click one thing at a time and keep holding down the shift key on your keyboard to do a multi-selection.
Finally, press delete; cookie banner gone 🍪
Draw the rest of the fucking owl
Simply walk through your imported site, compare it to the original, and remove anything that doesn’t look right. I understand this step might come off as that classic drawing meme about the owl. But hey, we’re looking to add and change things so we don’t have to be too meticulous.
Step 4 – Edit text
Time to finally do some re-designing! Before you start, I propose that you make a copy of your imported page. So that you keep an original that you can refer to when changing things up. This is also helpful when you share your redesign with anyone.
How to copy a frame
Select your imported site frame; hover over the word Frame and click that.
Hit copy cmd+c (windows: ctrl+c) or right click and choose copy.
Aaand paste; cmd+v (windows: ctrl+v) or right click and choose Paste here
Pro-tip: rename your frames by double clicking the word Frame and just type something new. I suggest you rename to something like Original – Webpage name and Redesign – Webpage name. If you later choose to export these pages as PDFs or images, the file names will become whatever the frame is named.
Edit text
Now you can go nuts and edit texts in your redesign-frame! Double-click any text frame and you should be able to edit it. When you are done typing, simply press escape to leave the text editing mode.
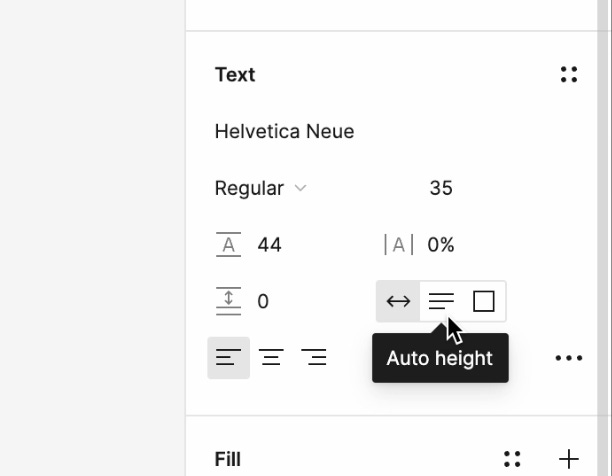
When you are in text editing mode, you’ll find tons of type options in the righthand panel. If you hover over the font name, weight and size, you’ll get dropdowns with more options to change all of that.
Click on the three dots and you’ll bring up even more type options as such:
Add text
Adding new text boxes is very easy. Simply press keyboard shortcut T or choose the text tool from the toolbar. Drag out a text box and start typing away! Press escape to leave text editing mode.
A common text box issue
You may come across a textbox that just extends sideways as the text grows. Try adjusting the text box constraint options in the righthand panel. The text box is probably set to Auto width, try changing it to Auto height or Fixed size.
Step 5 – Adding new images
Here’s a really fun part. You can very easily add or switch existing images by just dragging and dropping from your computer or grabbing something off google.
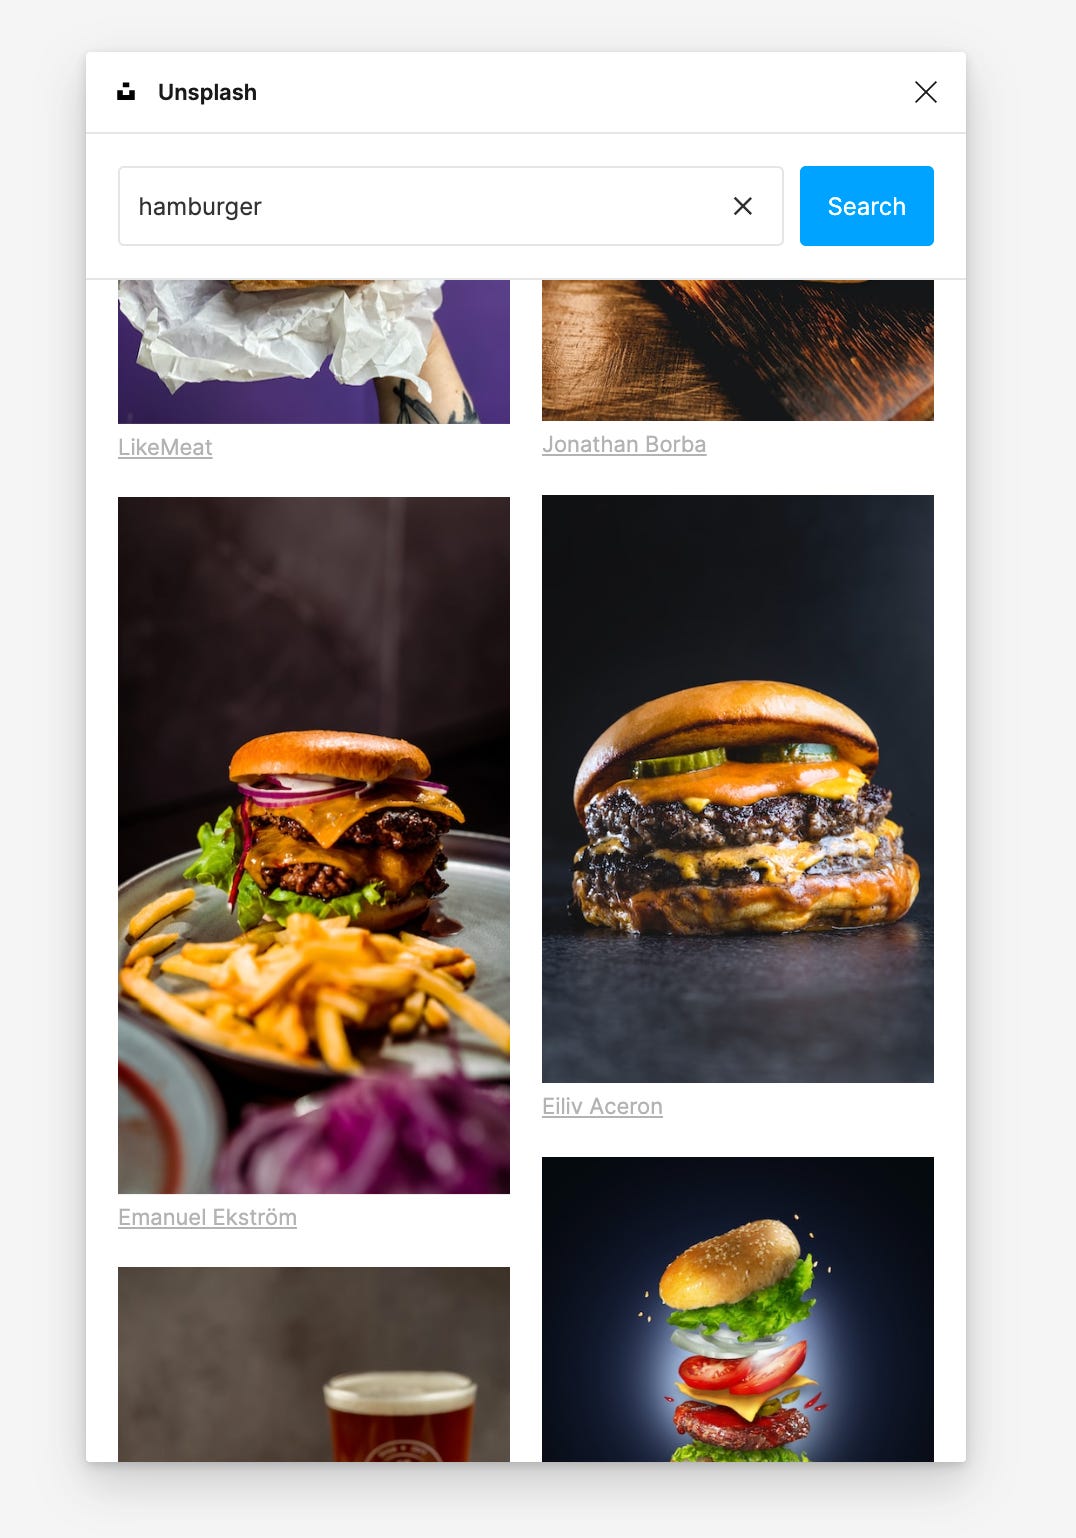
But if you are doing something commercial you might want to consider using an excellent plugin called Unsplash. This plugin gives you access to millions of high quality stock photos that are not only free-to-use but also approved for commercial use.
Fire up the Unsplash plugin: go to the Resources tab > Plugins > Search for “Unsplash” > click Run
Go to the Search tab and look for whatever you want. In my case I want to put a picture of a juicy burger next to the Uber Eats promo text. Simply click on any picture in the Unsplash dialog and it will land anywhere on your canvas in its full resolution.
That is of course way too big. You can resize the image by just grabbing a corner and adjust to your liking.
Looking good! Rinse and repeat.
Step 6 – Adding new icons
Icons are great for spicing up a design and to make it “pop” a little more (cue the designer cringe memes).
There are thousands of high-quality icon packs you can use in your design which you can find using more plugins or simply copying over from other Figma files from the Figma Community (a built in free “marketplace” where creators share free templates and assets for Figma).
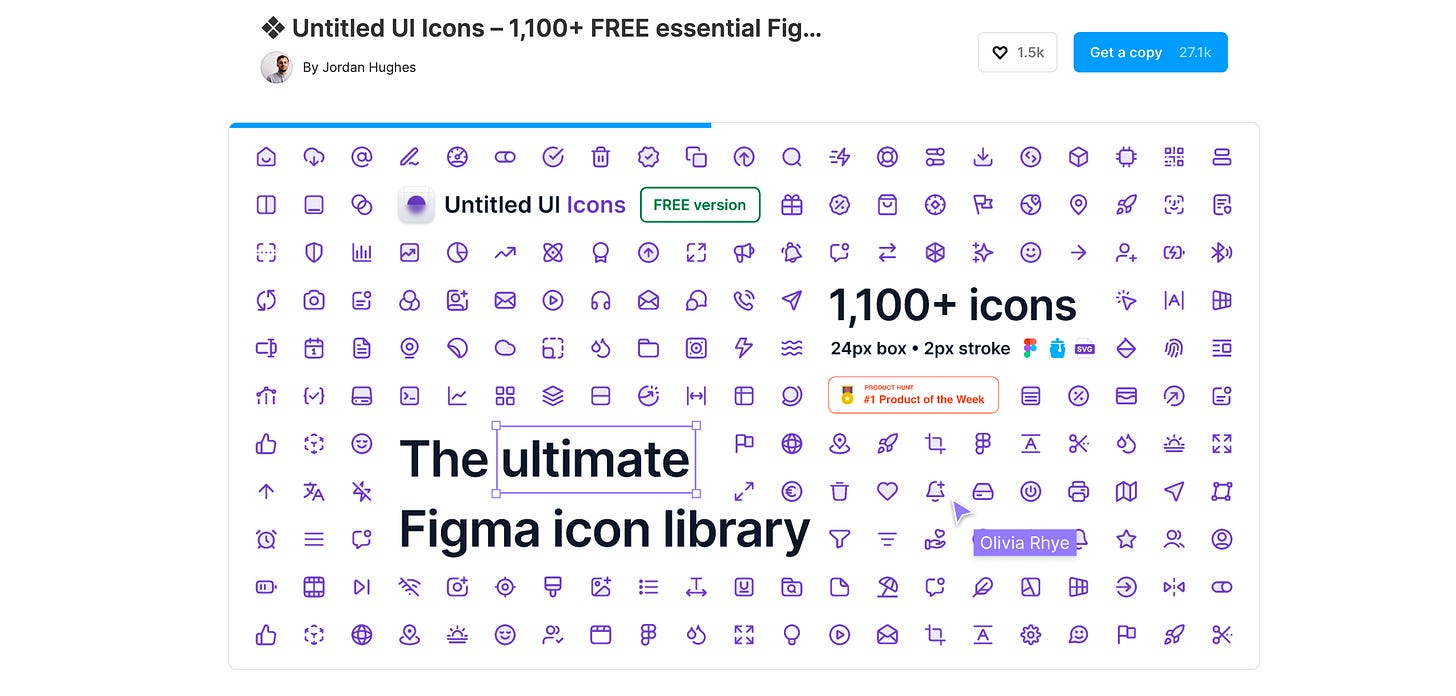
Just to get you started, a comprehensive icon pack is the Untitled UI Icon-pack
Click that link and then click the button saying “Get a copy”. This will open up a new tab in Figma where you can simple copy any icon and then paste it into your redesign.
I copied over an arrow I want to put on this Sign up to save button. A problem is that a black arrow won’t be visible on a black background button.
When you have the icon marked, have a look at the righthand panel. There’s a section called “selection colors”. This shows exactly what colors are included in whatever you have selected currently. Click on the black color and the color adjustment panel will pop-up. Adjust to your liking.
I opted to make my arrow fully white to fit into the style.
Get those icons in 👩🎨
Step 6 – Sharing your design
Maybe you rather keep your redesign to yourself. But the point of Figma is to share your design. And share often.
Figma’s comment feature makes it super easy to collaborate and co-create something awesome. Here’s how.
Head on up to the share button and click it. There are many options to share. Here are two ways I recommend:
Option 1. You can opt to share this file as just an URL you send. The file will be viewable to anyone with URL which makes sharing very frictionless.
Option 2. If you have security concerns, I recommend you only invite the people you know should have access using their email address. And set the access option to "Only people invited to this file”
Anyone clicking the URL (or being invited), will be asked to create a free account to start interacting with the file.
You can ask them to leave comments using the comment feature. It’s accessible from the toolbar, or simply click keyboard shortcut C.
Then click on any part of the design you want to call out and simply write your message.
You can ping people using the @ symbol in comments and they will get an email notification on the address they used to sign-up.
Pro-tip: With the comment tool selected. You can click and drag to draw a rectangle highlighting an entire section.
Exporting your design as an image
With Figma being a browser based design software, there is rarely any point to doing it “the old school way” and exporting your design as images to share them.
But I understand that some people might want to use images to put them into presentation decks or other forms of static documentation.
It’s luckily very easy.
Mark any frame (or element inside the design) that you want to share.
Go to the righthand panel and at the very bottom of the page you’ll find the Export option.
Click the plus to make the frame exportable and adjust the file type to your liking. Clicking plus again will mean you can choose to export your file in multiple file types (or sizes for PNGs and JPG).
Hit export, done 🏁
Wrapping up
I hope you’ve had some fun playing around with Figma!
If you have any questions or would like some support playing around with Figma, feel free to connect with me, I tend to be active on LinkedIn and an email works too.
My mission with this post is to get more people involved in the design process and sharing their ideas visually. If you think that mission makes sense, feel free to help out and sharing this post with a colleague!
And, if you want to be notified when I write my next post, just subscribe and you’ll get an email. You can always unsubscribe if you change your mind.
Stay awesome!
/ Johan


